
How to Easily Transform an Old Desk with Marble Contact Paper

Earlier this year, I decided to upgrade my desktop with marble contact paper. I love the marble look (I mean…who doesn’t!) and I really didn’t like the current orangey granite surface of the desk.
Marble contact paper is such an easy and budget-friendly way to add some glam to your countertops, whether in the kitchen or bathroom, shelves, tables, cabinets and even storage boxes.
It’s also been used a lot by renters especially since it can be removed at any time.

(This post contains some affiliate links. This means I may earn a small commission if you make a qualifying purchase, at no additional cost to you. Read disclosure for more info.)
I’ve been using this marble contact paper for some time now and I absolutely love how thick and realistic looking it is. It’s also quite wide so depending on the width of your surface area, you can have a seamless application. The price is really great for the quality as well.
I know sometimes applying contact paper or sticky back vinyl can be a finicky process but stick with it. It’ll be worth it. The contact paper is normally forgiving so you can remove and re-apply small portions of it to get it into place.
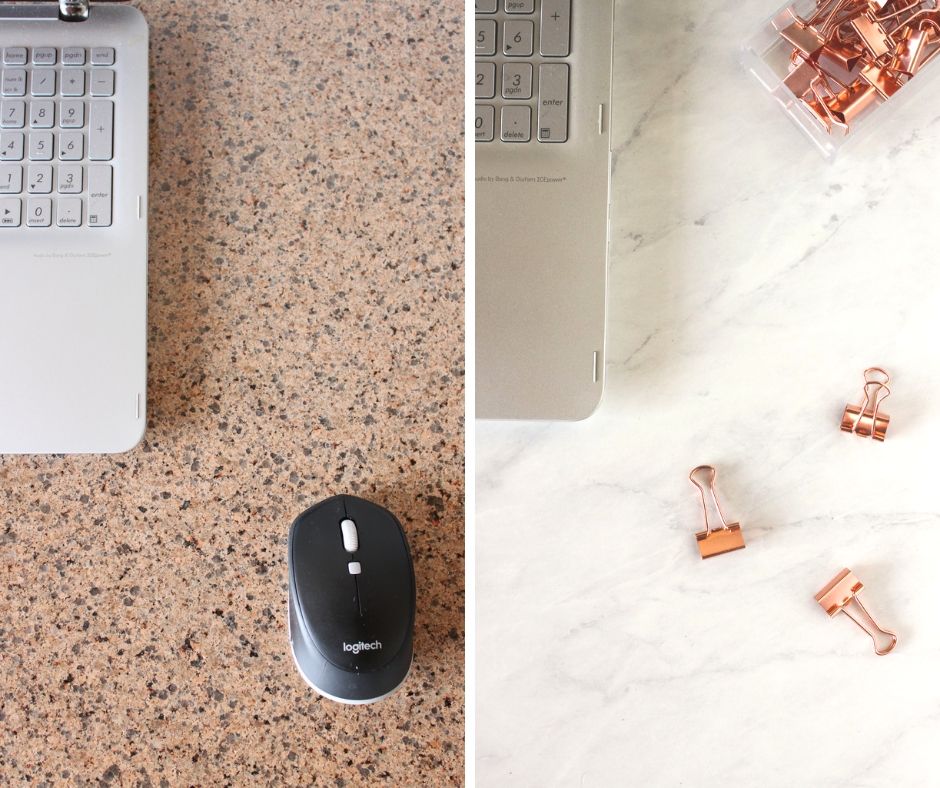
Here’s the before…
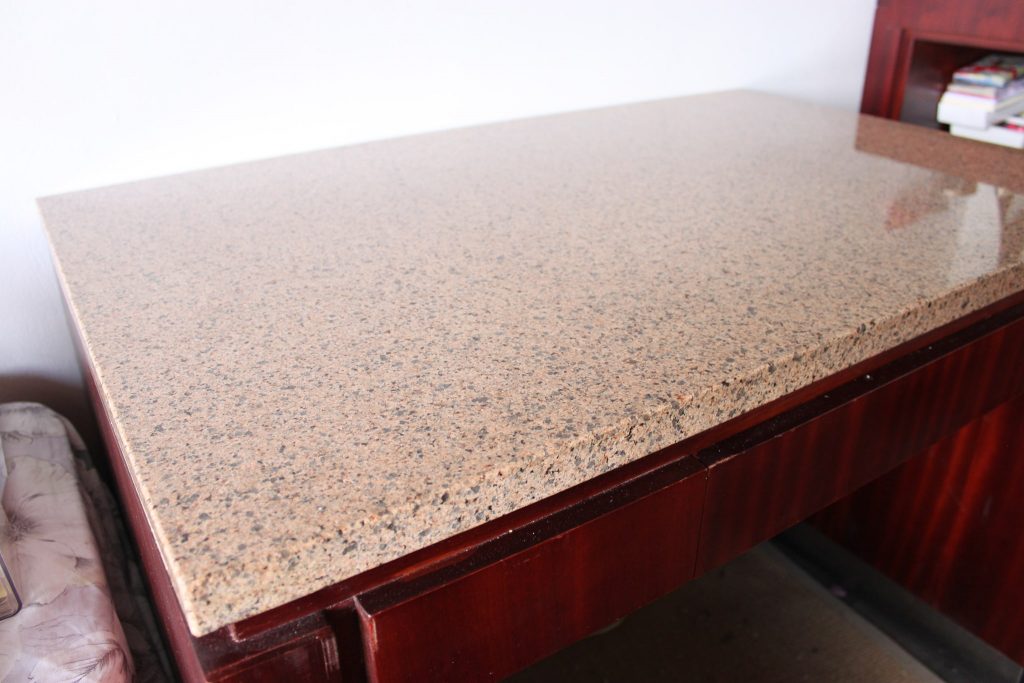
Not bad by any means but definitely not my style (I like light and bright).
Alrighty, let’s get to the deets…
(I intend to make a video showing how to apply it to another, smaller tabletop so I’ll update the post later on.)
How to Apply Marble Contact Paper
Just a few materials are needed in addition to the contact paper to help the application process be as smooth (literally!) as possible.
Materials:
- Marble Contact paper
- Microfibre cloth or soft rag
- X-Acto knife (or scissors if you prefer)
- Ruler
- Pencil
- Pin (in case of bubbles)
- Cutting mat (optional but recommended, especially if using an X-Acto knife or similar blade)
- Old credit and bank card (optional, needed to smooth out any bubbles)
Steps:
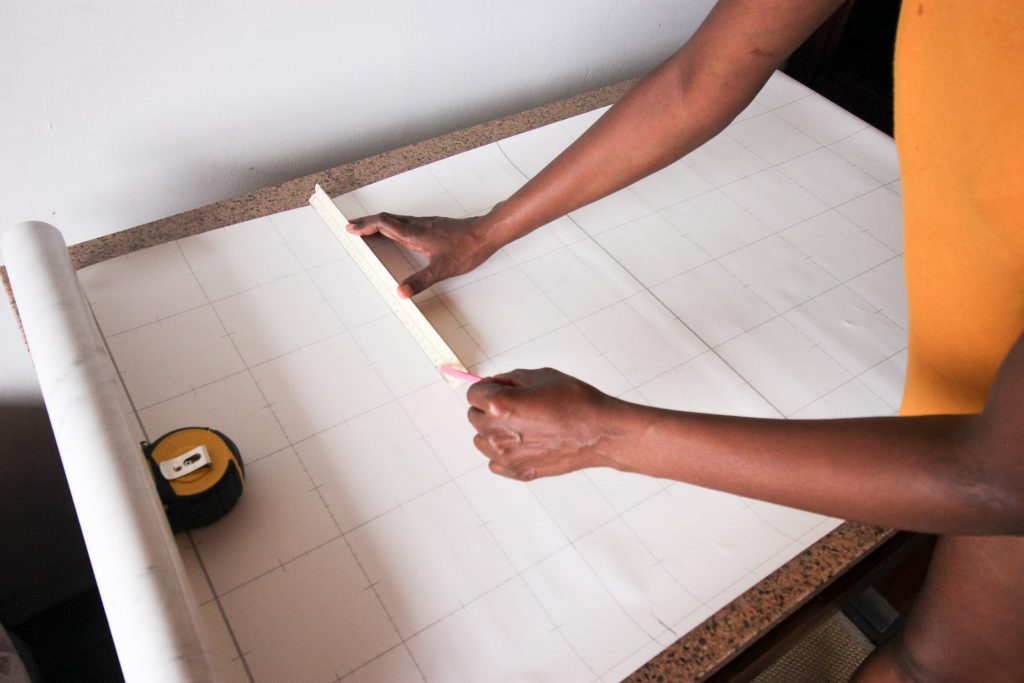
Spread the contact paper across the surface area to determine how much is needed. You’ll need to add a few extra inches to each edge to wrap the paper around the side and underside of the desktop.
Wipe the surface area with a slightly damp microfiber cloth to ensure that it’s free from dust and lint, and let dry. It shouldn’t be too long.
Draw a light pencil line on the backside of the paper where you need to cut.
Using the X-Acto knife (and cutting mat), cut paper to size and put aside.
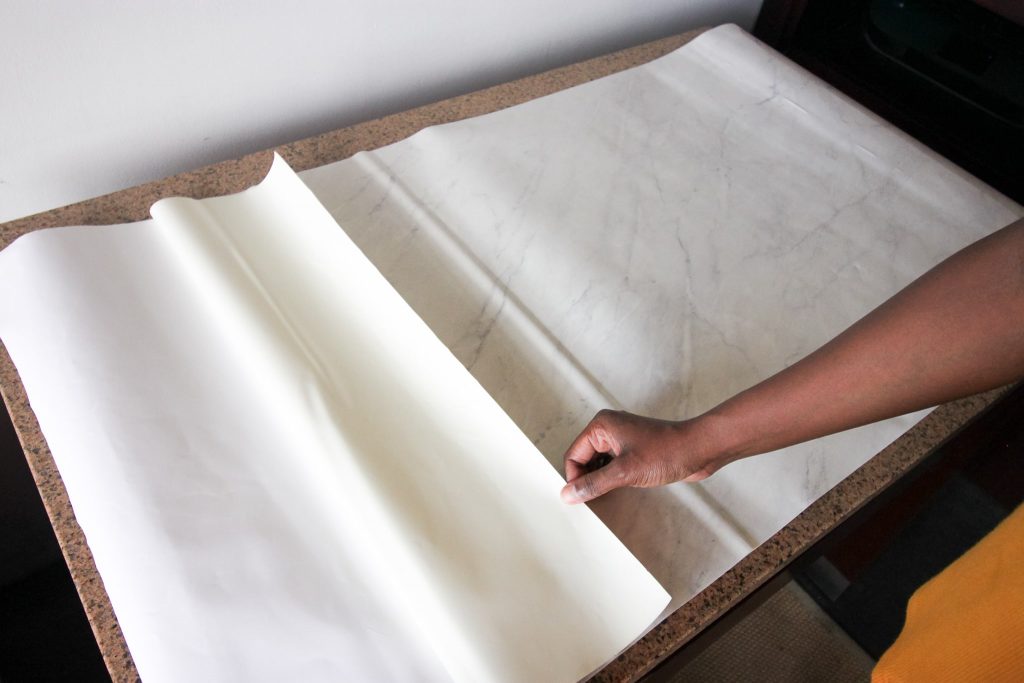
Next, peel back a small section of the paper at a time. For the desk, I peeled back about 4-5 inches across the length of the roll. For reference, my desk measures 42 inches x 27 inches.

Because I had to get the paper on the underside of the desk and I couldn’t flip it over, it definitely took me a few tries to get the paper lined up straight. If you’re doing a countertop, it should be easier to line up the edge of the paper with the edge of the countertop where it meets the wall.
So be patient. Depending on what you’re covering, It may take a few tries and some under-your-breath…er… “murmurs” before getting the paper lined up the way it should be. 😉
I should apologize here because I was so focused on getting the paper on the underside of the desk that I completely forgot about taking photos since I needed both hands to get it in place. #sorry 🙁
But you’ll want at least a ¾ inch overlap underneath to keep it secure. If it’s too short, you may run the risk of the paper popping up and not staying secure underneath.
Sidenote: If you’re using a lightweight desk- or worktop that can be removed, it’s easier to flip it upside down and secure the contact paper on the underside and turn the top back over to finish the top surface.
Also, if you need more ideas for creating a small home office, check out this post.
Once the underneath and sides are secure, slowly begin pulling back the paper over the top of your surface.
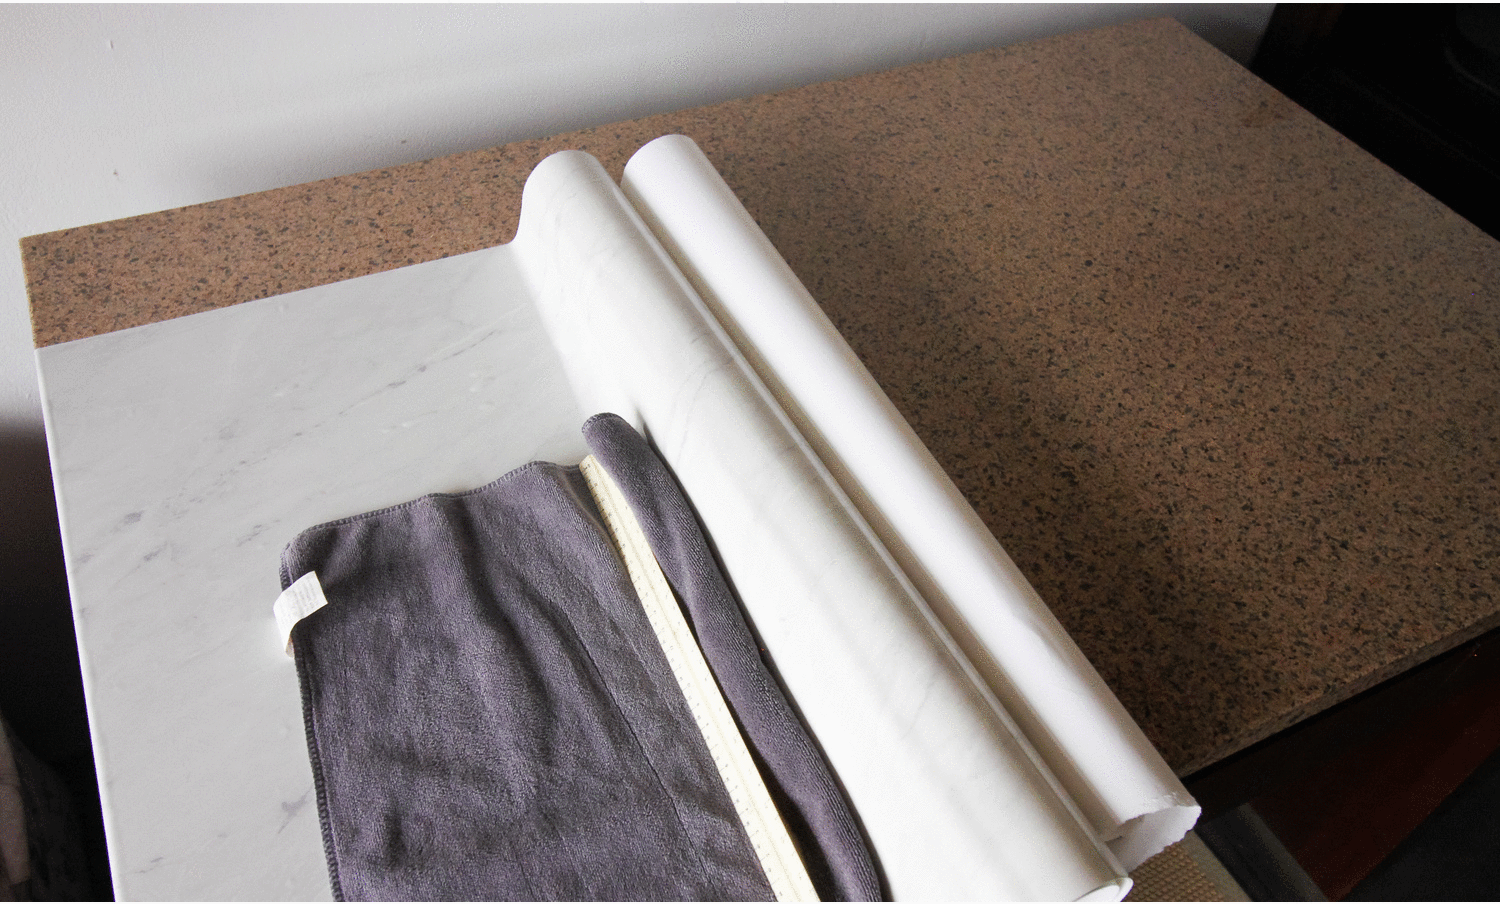
Wrap your ruler in the microfibre cloth and as you slowly pull the backing from the contact paper to expose the sticky side, push the ruler across the top of the paper in the same direction you’re pulling it to stick it to the desktop.
I found that wrapping the ruler (or old card) in a soft cloth prevents it from scratching the paper as you use the ruler to smooth it out.
You don’t want your new *marble* countertop full of scratches 😉 lol.
Repeat this process across the entire surface area. Wrap the paper over the side and underside of the desktop.
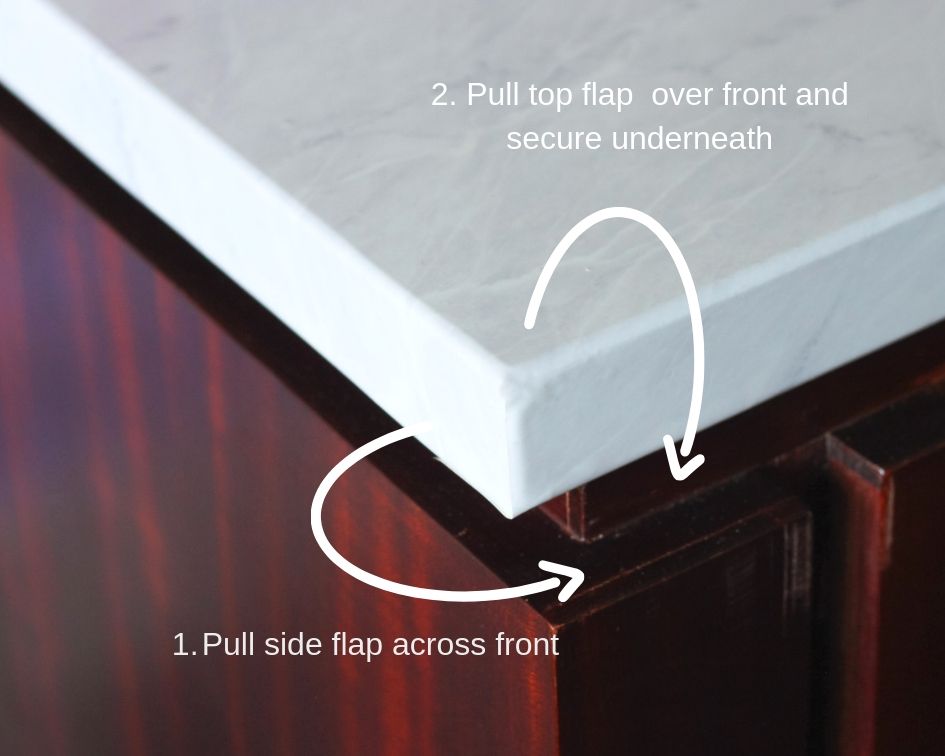
For the corners, snip the corner of the paper to match the seam/corner of the desktop. You want 2 separate flaps instead of one continuous piece.
Stick the side flap across and then pull the top flap over it and underneath the desktop.
If you’re working with a rounded edge, you’ll obviously need a different technique. Use a blow dryer to heat the paper to make it more pliable and stretchy. Pull the paper down, smoothing out the seams as you go along. Secure it underneath as above.
I haven’t had to do that with this thicker marble paper yet though but I’ve seen some of the reviews mention doing it. This thinner matte gold marble contact paper, which I also own, may work better for that.
After applying the contact paper, check your surface for any air bubbles. Use a pin to poke holes into any bubbles and go over the area with your finger or the card to ensure all the air is let out.
You’ll notice that the paper didn’t reach the back of my desk. To cover that area, I measured and cut stripes to go across the area.
If you have a similar issue, try to cut strips of the paper so that the veins of the marble match up. I needed 3 strips to cover the area. You can see the seams but that area is usually covered with stuff so it’s not very obvious.
And that’s it. Time to step back and admire your handiwork!
Related posts:
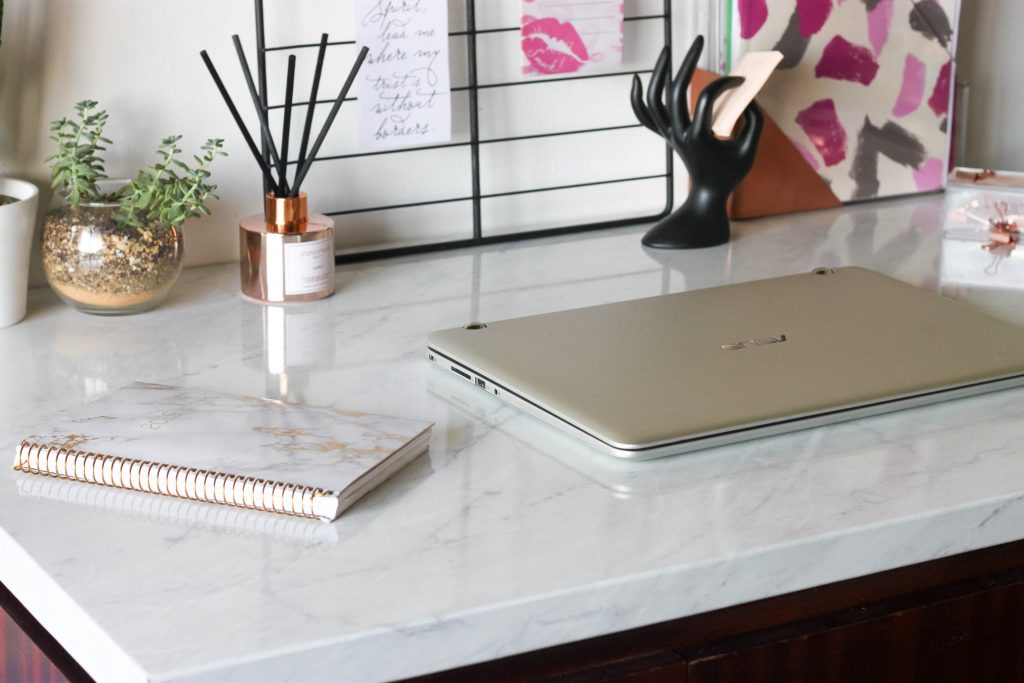
Can we take a moment to appreciate the before and after?
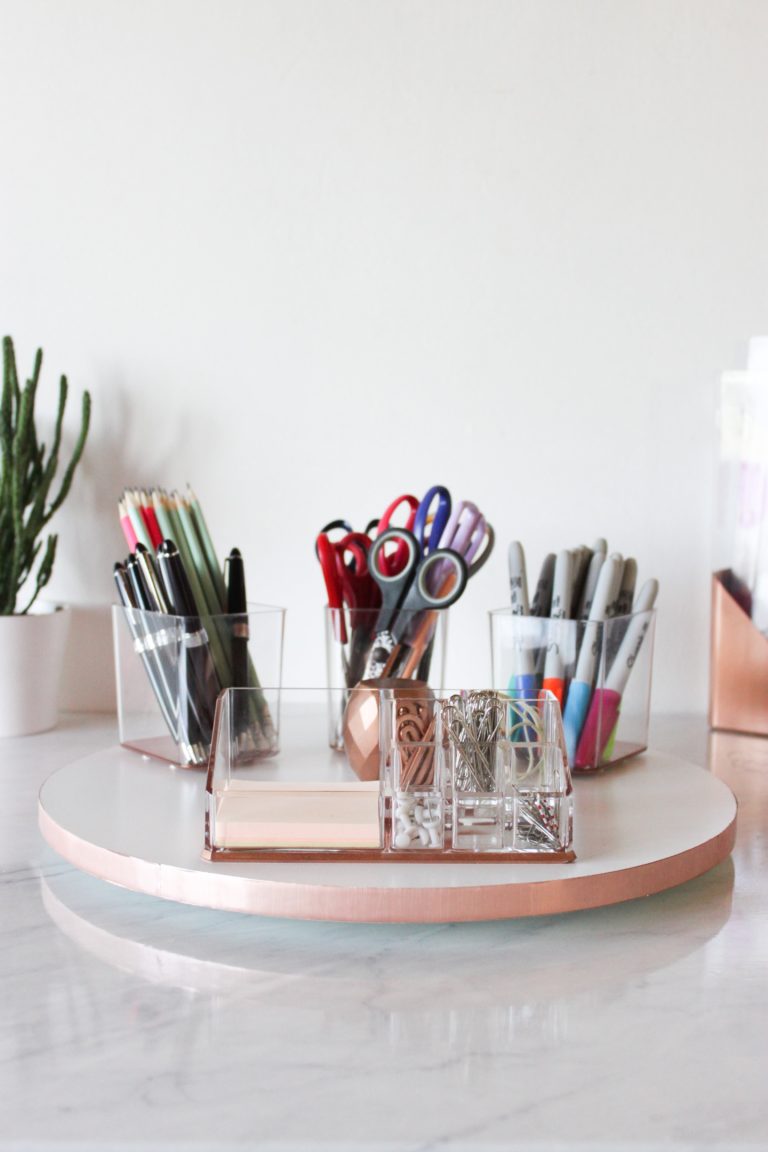
Tips for Using your Faux Marble Counter/Desktop and Protecting the Marble Contact Paper
So just a few tips about how to use and care for the surface to ensure that your contact paper lasts a while.
- Like real marble, you shouldn’t place hot items directly on the desk/countertop. I’ve placed a cup of tea on it before without any problems, but just to be safe, I generally use a coaster.
- Avoid using any abrasive cleaners on the contact paper. This paper is reflective so it does scratch and will probably get dull if something abrasive is used on it.
- If you’re using it in a kitchen, for example, some mild soap and water should generally do the trick.
- Because I’m using this in my workspace, I generally just need to pass a damp microfiber cloth (no soap) to clean it ever so often.
- Don’t use any sharp objects directly on the contact paper. It’s thick, yes, but it will be sliced just like any other contact paper.
Thinking of trying it out? Let me know what you’re thinking of using the marble contact paper on in the comments. I’d be happy to answer any questions in the comments.
And feel free to pin or share


It looks so pretty, but I did it on a scalloped desk, so I had to cut around the curves. How do I keep edges from eventually turning up. ?
Hi ~ Can this be used on MDF?
Hi! How did this hold up with wear and tear? I have an *ugly* kitchen Table I’m thinking of sprucing up with paper but not sure of the durability!
Niceness, what brand contact paper did you use?
Cathy
Auto correct butchered your name. Sorry!
lol… happens to me as well.
Hi Cathy! The brand I use is Very Berry Sticker. It’s linked in the post so once you click, it’ll take you to the product on Amazon. Really good stuff.
So pretty! I need to try this this month with my old desk
Yess! Please do and let me know how it turns out.
This looks great. I consider myself contact paper challenged. But you make me want to try again.
Thanks Kenyatta! Yes, do try again. It is finicky at times but so worth it.