
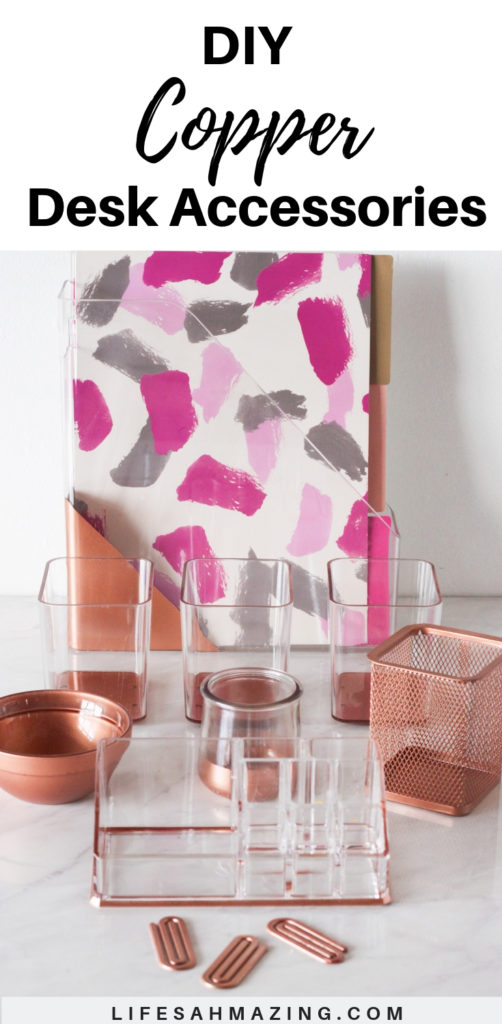
Chic DIY Copper Desk Accessories (how to transform your acrylic and plain glass containers)
If you’re feeling uninspired by your workspace or desk area, an easy way to inject some style is by using spray paint to make plain or boring desk accessories super chic.
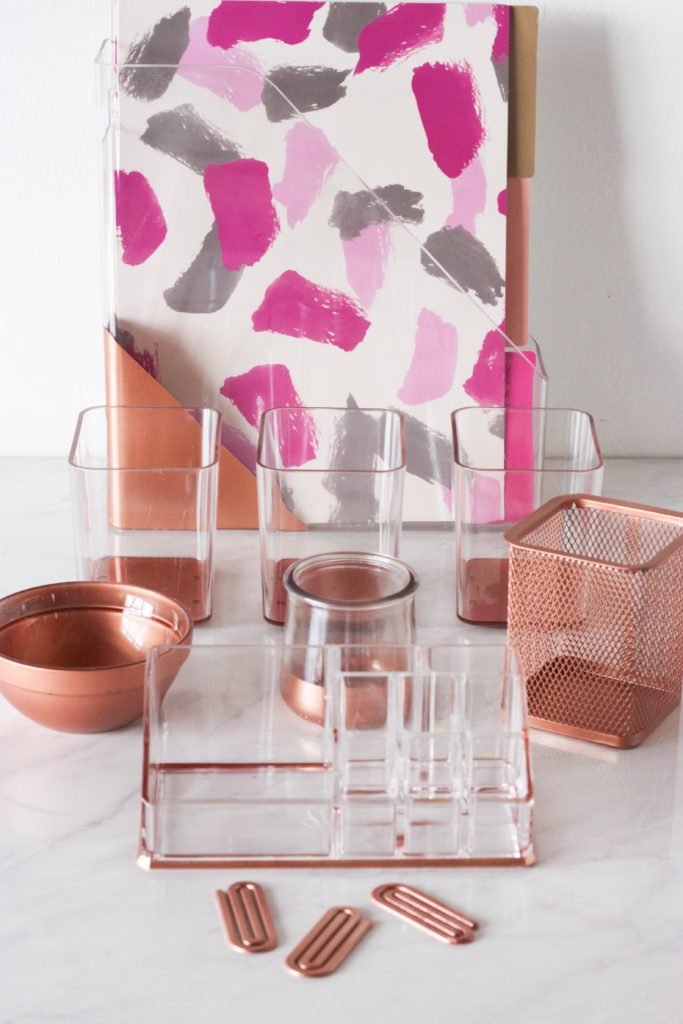
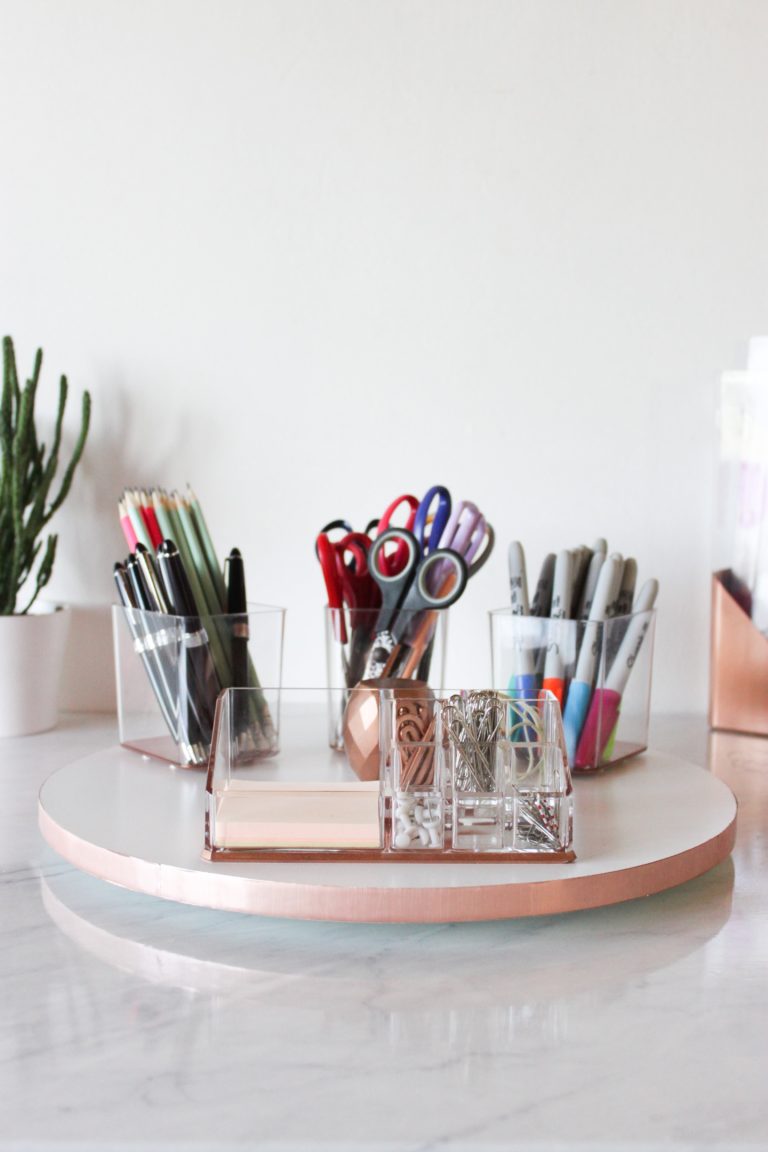
Over the past few weeks, I’ve been working on revamping my office nook and desk space at home. I wanted to add a touch (or lots of touches lol) of glam to the desk area so I coordinated some of my existing desk accessories with copper spray paint.
Acrylic and gold/rose gold/copper accessories are really trending right now and I love it! Chic desk accessories make working so much more fun! Don’t you agree?
I had a variety of different acrylic and glass containers I already owned and just added touches of copper to most of them.
I didn’t want to go overboard with the matching so I tried to keep the copper to a minimum on the acrylic/clear plastic containers in particular.
Related posts:
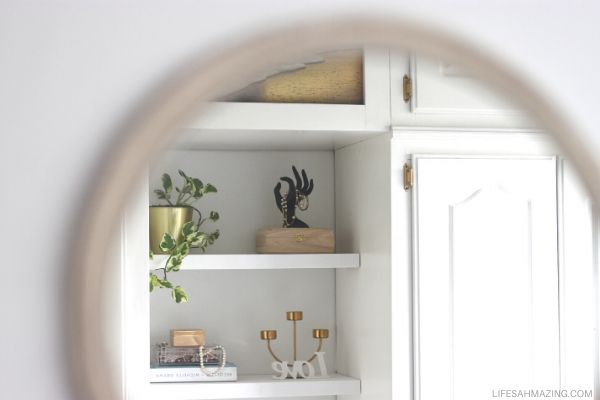
- How to DIY a Lazy Susan to Organize Desk Accessories (Super easy!)
- How to Transform an Old Desk with Marble Contact Paper

This post may contain some affiliate links, meaning I may earn a small commission from qualifying purchases. Read my full disclosure here).
DIY Copper Desk Accessories
Just a few steps are necessary to achieve the look.
Supplies I used:
- Acrylic file and magazine holder (you can also get a 4-pack here)
- 3 boxes from Ikea Godmorgon 5-piece box set (clear set no longer available)
- Acrylic Makeup Organizer
- An old glass yogurt jar and glass bowl
- Random dollar store metal pencil/pen holder I included on a whim
- Copper Metallic Spray paint (for a lighter, more Rose Gold finish, try this spray paint)
- Blue Painter’s tape
- Cling wrap or foil (not pictured)
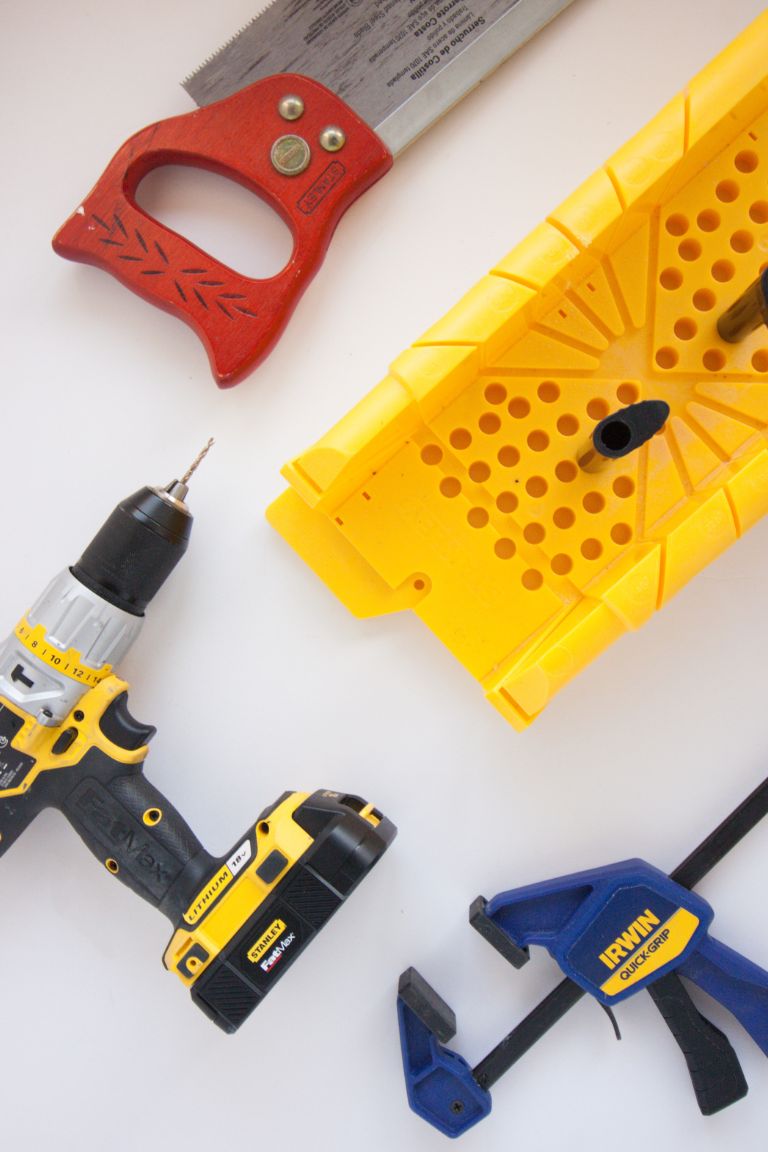
I gathered the items I wanted to update (I ended up not spray painting the tape dispenser):

Next, I taped off the areas to be painted with the painter’s tape to get crisp lines.
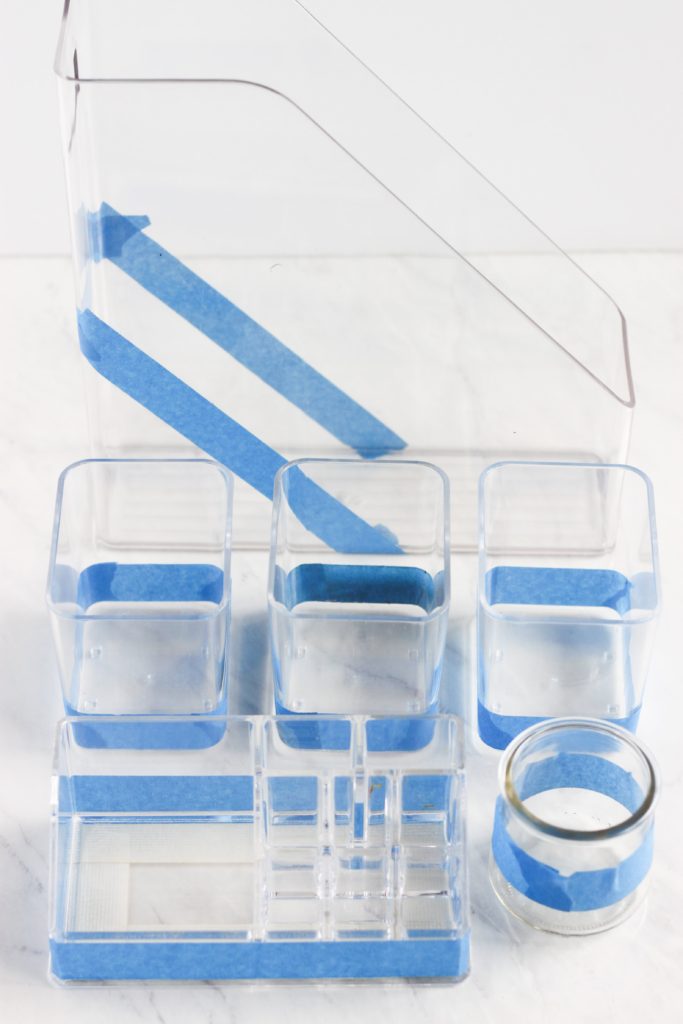
Then I used cling wrap to cover the sections that wouldn’t be painted to protect them.
For the magazine holder, I tried out the Glad grip… but regretted using it since it left a sticky residue in some places on the acrylic holder.
I was very sad about this… sigh. So I switched to cling wrap for all the other items.
I sprayed each item with several light coats of paint, allowing them to dry for a few minutes between each coat.
I wanted varying degrees of coverage because once I started spray painting them, I found the copper seemed a little darker than I had anticipated.
And I didn’t want to darken my new marble desktop.

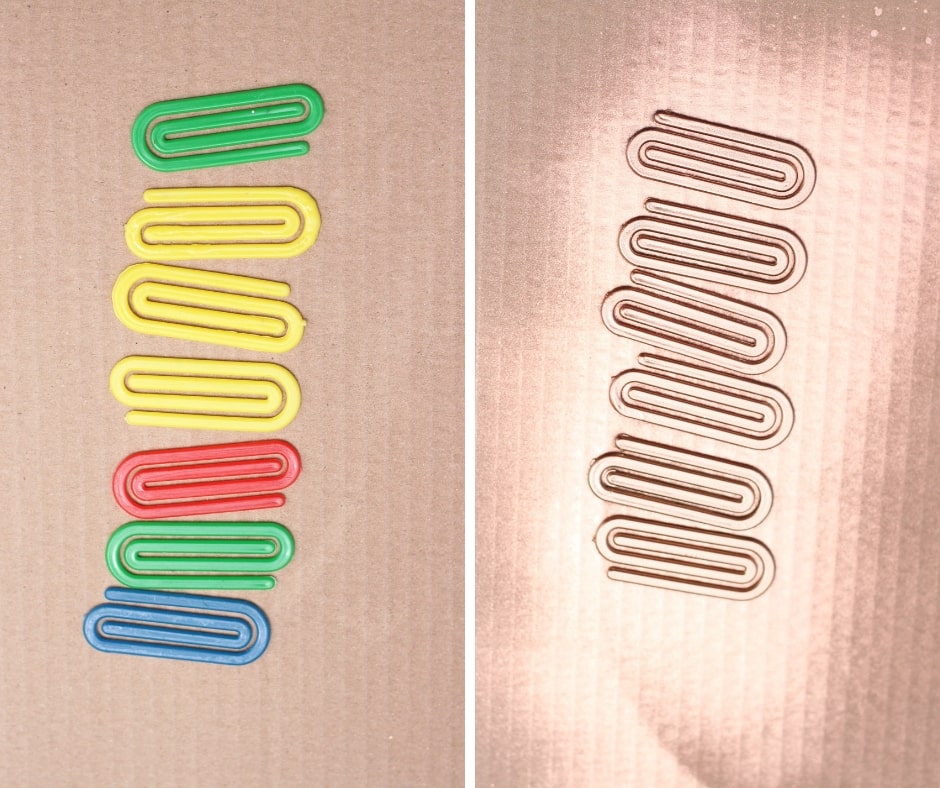
I even spray-painted some giant paperclips I had on hand. lol
For the glass bowl, I used clear sealant since it would be handled directly whenever I needed to use or move the bowl. I didn’t seal the other items since the paint was on the bottom or in areas I wouldn’t need to touch.
I left everything to cure for a couple of days although overnight would usually suffice.
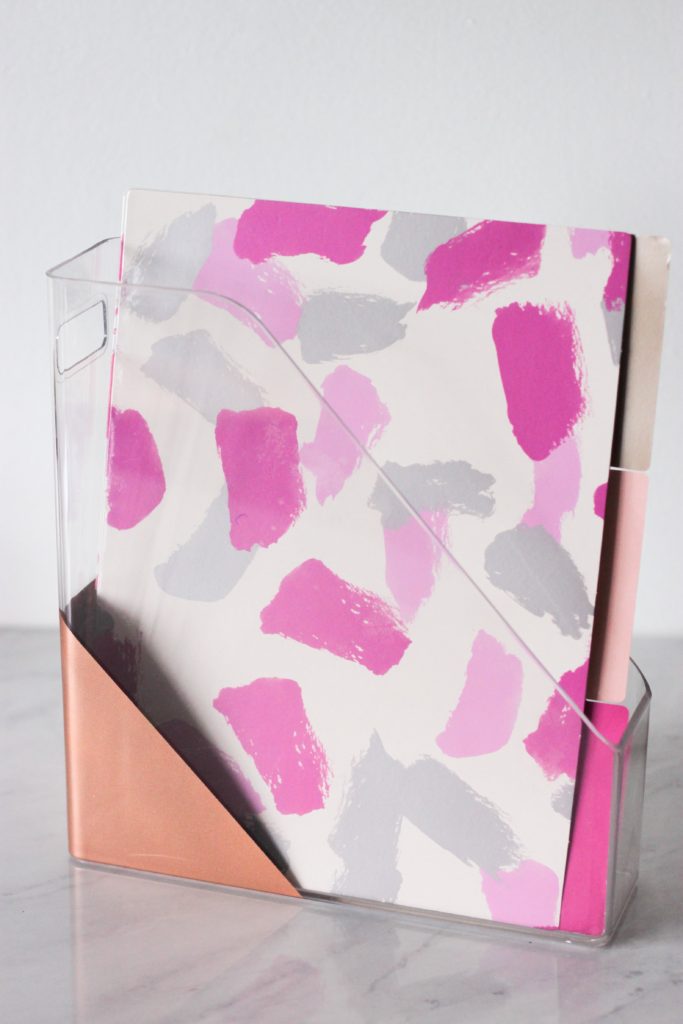
Acrylic File Holder | Pretty file folders
Like I mentioned in my initial Organize With Me post (you’ll see the scary before photos), these were the things I needed to tackle in the space:
I’ve linked to the posts for the items I’ve completed.
- Create a filing system
Get a desk plannerGet a proper desk chair- Organize desk accessories – See how I made a DIY lazy susan to organize stationery
- DIY Wall Grid (in progress)
- Reorganize drawers in credenza
Storage for printer- Transform desktop with marble contact paper
- Paint credenza
As you can see, I still have some things to do to complete the revamp. Fingers crossed, I’ll be able to finish these before the end of the month. I love how the copper accessories turned out and with the marble, everything instantly looks super chic. I’m already excited to see how everything turns out!
Are you into the copper trend? Let me know in the comments.
Feel free to pin any of the images

This is just ahmazing, pun intended !!! Love it and this is a def must try for me . Thanks for the inspiration.
Thanks much. Definitely give it a try! Would love to see.
Wow I absolutely love how everything came together and I also love the rose gold touch. Can I hire you to do mine? Lol btw why so many scissors? (Just an observation) ✂️ ?
http://www.travelbeautyblog.com
Thanks much Shevy! Lol… re the scissors, there are a few craft ones in there which cut with different patterns. We’ve had them I swear since I was a teen. And then I have sets purchased over the years. There are actually more! 😀